This is an old revision of the document!
Table of Contents
Installing and Using the NNELS Template
Download Template to Computer
The first thing you have to do is download the template to your computer.
- Download the NNELS Template
- Put the template file into the Templates folder of Microsoft Word. The location of this folder may differ depending on your operating system and version of Word. See User Templates File Location below for locating your Templates folder.
NNELS Template once, but you will have to clear the styles and upload the template every time you start a new document.
Clear Styles and Import Template to Document
For each new document you produce, you will have to clear the styles, and upload the NNELS Template.
First you need to Clear the Styles:
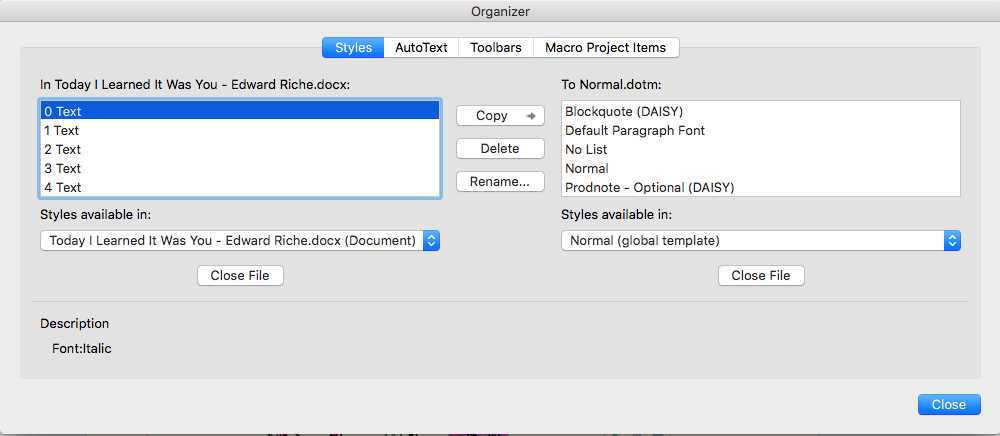
- Open the document that you want to edit in Word
- Go to
Formatin the main menu bar in Word - Click on
Style - Click on
Organizer - You should see 2 columns. One column (on the left) will display all the Styles in your current document. View Organizer window
- Delete all the styles in the current document:
- Highlight all the styles in the current document and select
Delete.
- Close the Organizer window.
Default Styles that can't be deleted. Simply hit okay until finished. Once done, you will only see the Default Styles in the Organizer window.
ctrl + A for windows or command + A for Mac to select all styles.
Now the styles are cleared you can import the NNELS Template to your document.
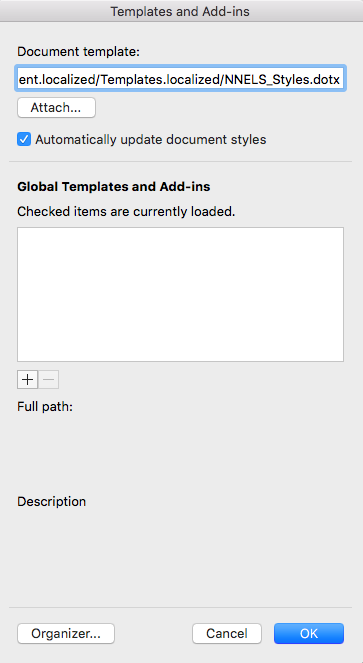
- Go to
Toolsin the main menu bar in Word - Click on
Templates and Add-ins…View Templates and Addins window - You should see an option to attach a Document Template to the current file. Click
Attach. - Find the
NNELS_Styles.dotxthat you put in your Templates folder and attach it. - Check
Automatically update document styles - Click OK. This will close the window.
- Open your Styles Pane
- Select Show all the Styles
- You should see a bunch of new styles that have been imported from the NNELS Template. The styles all have “DAISY” in the Style name, except for the Heading 1-6 styles, Strong, and Emphasis. View NNELS Styles
- Start applying these styles to text in the document!
There is no need to make any modifications to the Styles as they're already set-up
For instructions on applying the styles, see: NNELS Styles
User Templates File Location
You can discover where your copy of Word stores its templates by looking in the Preferences. Choose Word | Preferences and under Personal Settings choose File Locations. The location is given beside the item User Templates in the list. If the location is abbreviated and you cannot read it properly, click the Modify button and explore the location.
If you use a Mac, you can use spotlight search and search for templates. The folder should come up in your search.
By default, user templates files are stored in the following location:
In Windows XP:
C:\Documents and Settings\<username>\Application Data\Microsoft\Templates
In Windows Vista or in Windows 7:
C:\Users\<username>\AppData\Roaming\Microsoft\Templates
In Mac (Word for Mac 2016):
/Users/<username>/Library/Group Containers/UBF8T346G9.Office/User Content/Templates
Note: You can change the location of user templates files.
Further Resources
- Microsoft Office Support: Load or unload a template
- Word 2013 Support for Importing Styles: https://www.dummies.com/software/microsoft-office/word/how-to-import-styles-from-other-documents-in-word-2013/
